Monthly Archives: July 2013

The Trailer is Gone!

Sorry, we’ve been quite busy over the past couple of weeks with stuff, both house-building and work-related, but I though I’d put up at least something of an update.

Firstly, we’re rid of the trailer. The good free help we were talking about before went AWOL, so the last push was just us (with help from my brother… you’re awesome, man!) There’s still some trash lying around the site that we’ll get to, but nothing that presents a hazard to navigation or sitework.

We also had to cut up the steel frame of the trailer using some torches, which was a lot of fun, even in the 95-degree heat. I’m sorry about some of the weird colors in the pictures, but the camera had a really hard time dealing with the direct sunlight and the super-bright light of the torch.

Lighting the torches!

Lighting the torches!

My brother and I started out in shorts and topless. A few minor burns later, we decided to put on some more layers...

My brother and I started out in shorts and topless. A few minor burns later, we decided to put on some more layers…
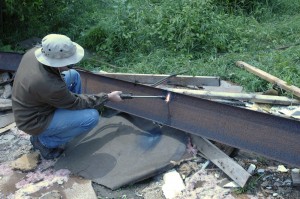
Kind of like this. It was very, very warm. I had sweat literally soaking through the fabric of my jeans.
Kind of like this. It was very, very warm. I had sweat literally soaking through the fabric of my jeans.

This was our high-tech rig for moving the oxygen and acetylene around the job site.

This was our high-tech rig for moving the oxygen and acetylene around the job site.

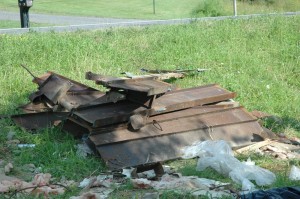
And scrap! We cut to about 6 foot because that's what we needed to fit in the truck. 4 foot pieces bring more at the scrap yard though.

And scrap! We cut to about 6 foot because that’s what we needed to fit in the truck. 4 foot pieces bring more at the scrap yard though.

Torches were very reasonable. We had to put down a deposit of $200 to rent the equipment, and it was about $20 to fill each tank. We had to re-fill the oxygen once, so total was about $60, which was covered by the cost of the scrap with beer money left over.

After that, we picked up trash. I hate fiberglass insulation. It’s itchy.

But our puppy-dog Tuna came over to help!

But our puppy-dog Tuna came over to help!

Also, baby turned 1. We jerry-rigged a ball pit for him:

Happy Baby!

Happy Baby!

Formaldehyde-Free Flooring, Roofing and Walling Part 2

The trailer is still up. This is frustrating. So in the meanwhile, I’ll talk some more about the theory of building a healthy house.

In Part I, I talked about the main sources of formaldehyde outgassing in the home, which are: Furniture, Walls, Floor Joists, Sub-floor, Hardwood Floor and Roof

I explained how we’re avoiding the formaldehyde in furniture and how we don’t have to worry about the walls (because we’re using ICFs). In this post, I’ll try to talk about floor joists and sub-floor, or only the floor joists if the post gets too long.

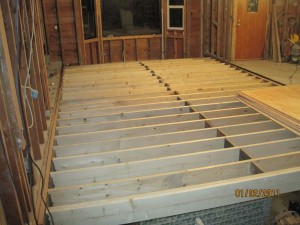
So, floor joists. They’re the things that hold up the floor. On a finished house, you usually don’t see them, but on an unfinished house they look like this:

Picture taken from this website.

Picture taken from this website.

You put subfloor over the top of them and then put carpet, linoleum, tile or hardwood over the subfloor. Except we all know that the only cool choices are tile and hardwood of course. On that picture, the floor joists are simply untreated dimensional lumber (2x10s by the look of them). Until not so long ago, that was pretty much the only choice. It’s also a pretty good choice because untreated lumber doesn’t outgas anything.

The problem is, dimensional lumber doesn’t commonly come in lengths greater than 16 feet. It’s just too hard to find trees that are tall, wide and straight enough. However, the interior span of our house is over 30 feet. Normally, you can work around that by correctly placing load-bearing walls so that no unsupported span is over 16′. However, our living room is 16′ 3.5″. That’s simply impossible to do with dimensional lumber. Oh no! Have we been gypped by our architect?!

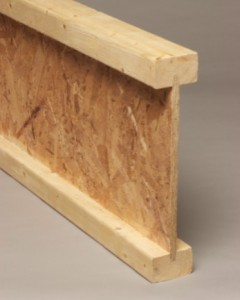
Fortunately, science comes to the rescue with a couple of options. One of them is I-beams, which consist of two pieces of wood attached to the top and bottom of a long piece of plywood:

This is a composite wood I-beam. Picture from this website.

This is a composite wood I-beam. Picture from this website.

The advantages are: an I-beam is stiffer than dimensional lumber of the same size. This means the floor is less “springy”. I-beams can also be much wider and longer because they’re not cut out off one piece of wood. Dimensional lumber doesn’t come in a size greater than 12″ wide by 16 foot long; I-beams, however, can be up to 16″ wide or even bigger if you custom-order, and they can be any length you want. A 16″ I-beam doesn’t need any support over a span of 32 feet! An I-beam will also not bend or warp due to age and humidity.

The disadvantages is I-beams use engineered wood and therefore outgas formaldehyde. They’re also more expensive than regular wood.

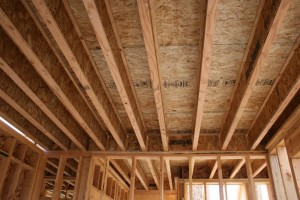
Here’s a picture of I-beam floor joists:

I-beam floor joists. Picture is from this website.

I-beam floor joists. Picture is from this website.

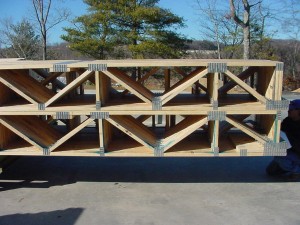
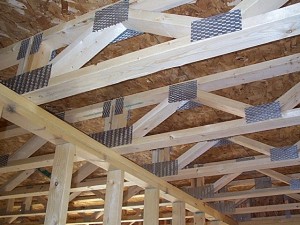
Another option are floor trusses, which are frames made out of 2x4s or 2x3s:

Floor trusses stacked on each other. Picture from this website.

Floor trusses stacked on each other. Picture from this website.

Advantages: no formaldehyde because they use regular untreated lumber. However, they may be coated with a fireproof coating that can outgas substances. That should be looked into. Floor trusses can also be made as long as necessary and strong enough to cover any span. Another advantage is that it’s really easy to run plumbing, ducts and electrical through them because they already have a bunch of openings going through them. For I-beams and regular wood trusses, you have to carefully drill holes through the trusses.

Disadvantages: they’re a little more expensive than I-beams, and much more expensive than regular wood.

Here’s a picture of floor trusses in action:

Floor trusses in action! Picture from here.

Floor trusses in action! Picture from here.

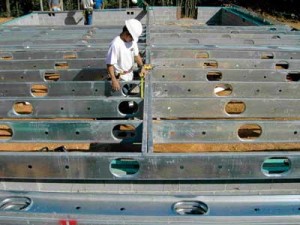
Final option: steel floor joists. They look like this:

Steel joists. Picture from here.

Steel joists. Picture from here.

Advantages: Tough and cheap (the only thing cheaper is dimensional lumber). Fireproof. Doesn’t outgas anything. As you can see in the picture, they have pre-drilled holes for plumbing and electrical.

Disadvantages: Not going to lie on this one – I’m personally a little leery of screwing sub-floor to thin sheet metal (which is what steel floor joists are made of). It doesn’t seem like that would be as strong as attaching the sub-floor to a nice, thick bearing surface. But I may change my mind as I look into this more.

So which of these options are we going with?

I’m leaning towards the floor trusses for the advantages that I listed. The cost is really not that much higher than I-beams and they don’t outgas formaldehyde. However, in the big scheme of things, I-beams don’t outgas all that much formaldehyde compared to all the other stuff that we mentioned: there’s only a few of them, they don’t contain that much plywood and furthermore they’re encased in the floor. Steel joists are being perhaps unfairly side-lined for the disadvantage that I listed above…

Oh, another advantage of I-beams and steel joists is that they’re available instantly! Floor trusses have to be built to your exact specifications and it usually takes a few weeks (I’ve been told 2-3 weeks). So keep that in mind!

Anyway, enough stuff about building. Here’s a picture of baby:

The child and I are not amused by how long it's taking to bring down this trailer. Can you tell how not amused we are?

The child and I are not amused by how long it’s taking to bring down this trailer. Can you tell how not amused we are?